

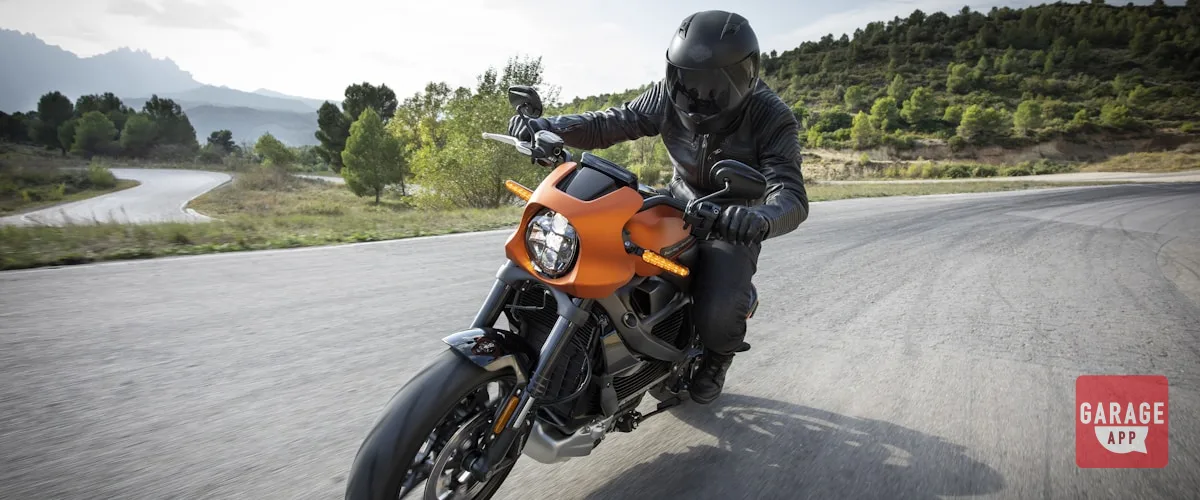
Your motorcycle deserves better than a rushed parking lot snap with a trash can lurking in the background and the sun straight overhead. A cafe racer, a sportbike, a tourer with 40,000 miles under its belt, they all tell a story when you frame them right. And since most people meet your bike on a screen long before they hear it fire up, that frame carries a lot of weight.
You do not need a $3,000 camera or a photography degree to pull this off. A recent phone, a bit of patience, and a handful of principles will get you most of the way to shots that genuinely look the part. Let's walk through light, angles, locations, and editing so your next post makes someone stop scrolling. If you want more in this vein, our video and photography section is worth a browse.
Chase the Light Before Anything Else
If one idea sticks from this whole article, make it this. Light is the single most important ingredient in any motorcycle photo. You can have the cleanest bike parked in the most dramatic spot, and midday sun will still flatten the paint, blow out the chrome, and drop ugly shadows across the engine. The right light quietly solves problems you did not even know were there.
Why Golden Hour Wins Every Time
Golden hour is that 45 to 60 minute stretch just after sunrise and before sunset when the sun sits low and the light goes warm and soft. It wraps around the curve of the tank, wakes up metallic flake, and gives everything a sense of depth that flat noon light never manages. Build your shoot around it. Check the exact sunset time for your spot with a free app, then show up half an hour early so you are set and ready when the light turns.
Put the sun behind the bike for a glowing rim-light effect, or keep it off to one side at roughly 45 degrees to pull out the texture and contours in the bodywork.
Working With Overcast and Night Light
Cloudy days are quietly brilliant. An overcast sky works like a giant softbox, killing harsh shadows and keeping colors rich and even. It is the most forgiving light there is because there's almost nothing to get wrong. After dark, hunt for pools of warm light from gas stations, neon signs, and streetlamps. A wet street glowing under a colorful sign gives you some of the most cinematic frames you'll ever shoot, with the reflections doing half the work for you.
Angles That Make a Bike Look Powerful
Most riders shoot their bike from standing height, looking slightly down at it. That angle shrinks the machine and makes it look smaller and softer than it really is. The people who do this well go the other way. They get low.
- Get low and shoot up, crouching or kneeling so the camera sits around hub or tank height, which makes the bike loom larger and carry real presence.
- Work the three-quarter front by standing slightly off to the front and side, catching the tank, front wheel, and engine in one frame, the most flattering angle for nearly any motorcycle.
- Use leading lines by turning the front wheel slightly toward the camera so the fork and bars pull the eye straight into the shot.
- Fill the frame with detail, the headlight, exhaust tips, a worn grip, the instrument cluster, all of which show how the bike actually gets used.
Variety is what separates one decent photo from a gallery worth following. On any session, try to walk away with a wide establishing shot, a clean three-quarter hero, a couple of tight details, and one creative wildcard. When you build out your bike's page in your digital garage, that mix gives you a feed that looks curated instead of repetitive. It also feeds nicely into our featured vehicles, where a strong set of shots is what gets a build noticed.
Location Sets the Mood
The right backdrop turns a bike photo into a scene. The wrong one buries the bike in clutter. You want a background that complements the machine without fighting it for attention. A matte black naked bike looks fantastic against raw concrete and industrial texture. A chrome-heavy cruiser comes alive in front of desert sand or a coastal highway. The same logic applies whether you're shooting a BMW, a Porsche, or a Ferrari at a mixed meet, match the setting to the character of the machine.
Backgrounds Worth Seeking Out
- Empty mountain switchbacks and overlooks, especially the ones you turn up while researching the best mountain driving routes and our wider routes and drives coverage
- Industrial areas with murals, corrugated metal, and graffiti walls.
- Quiet coastal roads at sunrise before the traffic builds.
- Old gas stations, abandoned storefronts, and weathered brick.
- Open desert or farmland where the horizon carries the shot.
Scout the location ahead of time without the bike. Walk it, note where the sun lands at golden hour, and lock in your composition first. Then you only need a few minutes with the motorcycle in the frame.
Some of the best backdrops come with a built-in crowd. A cars and coffee event at first light gives you clean early sun and interesting machines to work into the edges of the frame, and our shows and events section is full of gatherings worth scoping out. Always clear the immediate area first, though. A single stray water bottle, a road cone, or a power line slicing through the sky can wreck an otherwise strong frame. Spend ten seconds reading the whole scene through your viewfinder, not just the bike. Your future self at the editing stage will thank you.
A clean background is invisible. A cluttered one is all anyone sees.
Common wisdom among moto photographers
Camera Settings and Smartphone Tricks
You do not have to shoot full manual to land a great frame, but a few basics take the guesswork out of it. On a dedicated camera, a wider aperture around f/2.8 to f/4 softens the background and isolates the bike. Keep ISO as low as the light allows to hold off grain, and set a shutter speed fast enough to keep everything tack sharp.
Squeezing Pro Results From a Phone
Modern phones are seriously capable. The trick is taking control instead of letting the camera decide everything for you. A few of the best apps for car enthusiasts give you manual control and RAW capture without any real learning curve.
- Tap to focus on the part of the bike you want sharpest, usually the tank or headlight.
- Drag the exposure slider down a touch so the highlights on chrome and paint don't blow out.
- Turn on gridlines and lean on the rule of thirds to place the bike off-center for a more dynamic frame.
- Use Portrait mode sparingly for detail shots, but keep the regular wide lens for heroes so the edges stay natural.
- Shoot in RAW or ProRAW if your phone offers it, which leaves far more room to recover detail later.
Skip digital zoom completely. It just crops and softens the image. Move your feet instead, or use the dedicated telephoto lens if your phone has one.
Editing That Enhances Without Overcooking
Editing is where a good shot turns into a great one, and it's also where most people fall apart. Cranking saturation until the paint looks radioactive and shoving every slider to the limit reads as amateur from a mile away. The best edits are the ones nobody notices. They just make the bike look the way it felt to stand next to it.
Lightroom Mobile, Snapseed, and VSCO all hand you serious control for free or close to it. Get the basics right before you touch anything fancy.
- straighten and crop first, since a level horizon and a tight frame fix half of what feels off in a raw image
- lift the shadows and tame the highlights to recover detail in the engine and stop the chrome from glaring
- adjust white balance so the photo matches the warmth or coolness you actually remember from the scene
- nudge saturation and vibrance rather than slamming them, with vibrance being gentler and kinder to skin tones if you're in the frame
- add a little clarity or texture to the bike, then mask it off the sky so the background stays smooth
Consistency is what makes a feed recognizable. Find a look you love, save it as a preset, and run it across your shots so the whole gallery feels like it came from one person. If you want to dig deeper into growing an audience around your work, our guide for car content creators covers how that consistency turns into a real following. The same clean approach pays off when you document a longer project across our builds and restorations coverage.
Once the photos are ready, GarageApp makes it easy to attach them to specific builds and mods so followers can see exactly what changed and when. It turns a scattered camera roll into an organized record of your bike over time, and you can lean on the same GarageApp features to keep everything sorted. Long-term owners of a classic, exotic, or collector machine get the most out of that kind of running photo log.
Posting and Building a Following
A great photo with no plan still gets buried. Post when your audience is awake and scrolling, usually early morning, lunchtime, and evening. Write captions that add something, whether that's the story behind a ride, a question to spark comments, or the details of a recent mod. Engagement moves the algorithm far more than perfection does.
Tag your location, use a focused mix of hashtags tied to your make and riding style, and actually talk with other riders instead of chasing follower counts. This community rewards the real thing. Getting involved with local car and motorcycle clubs gives you both new faces to shoot and a built-in audience for the results. Sharing your shots and connecting with women riders and the wider moto culture builds the kind of relationships that keep people coming back. Document your bike consistently in GarageApp and you'll always have a clean archive of your best work ready to share.
Above all, keep shooting. Your tenth session will beat your first, and your hundredth will beat your tenth. Light, angle, location, edit. Get those four dialed and your motorcycle will look every bit as good on a screen as it does sitting in your garage. For more reading across every corner of the hobby, the full GarageApp blog has plenty to keep you busy.